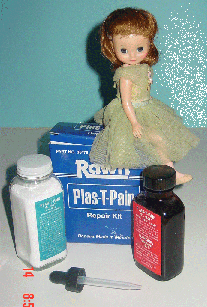
Broken and Worn, Hard Plastic Joints
Patient: 8" Betsy McCall
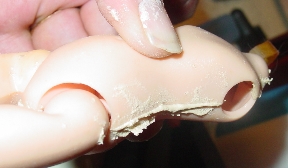
Problem: Broken Hip Joint
|
|
This Old Doll Hospital Broken and Worn, Hard Plastic Joints Patient: 8" Betsy McCall Problem: Broken Hip Joint |
|
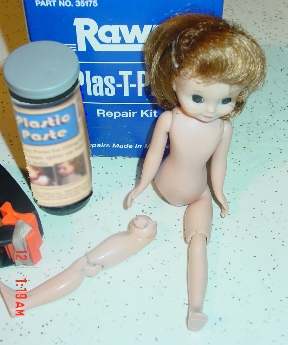
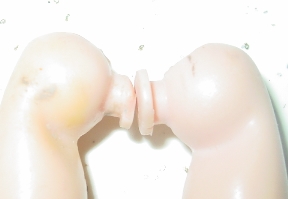
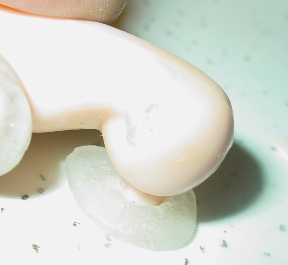
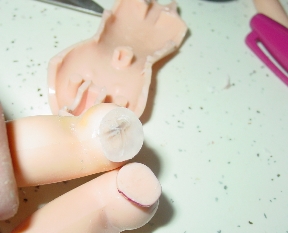
Her problem is the knob on the top of the detached leg. It's a sort of button that fits into a slot in the walking mechanism and it's so worn down, that it has fallen out of the socket. The task is to rebuild this button with Plas-T-Pair and put it back into the slot inside the doll. Major surgery, I'm afraid. |
|
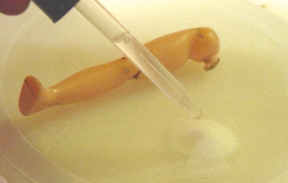
To get to the slot, the doll has to be opened. I'm doing it now so I can see the other leg and compare it to the broken one. A razor blade and a little determination will open the side seams under the arms and along the neck. The crotch seam is usually already open on these as a result of the same stress that broke the button on the hip. Push in the blade and wiggle it left and right to crack the bond, then push a bit further, wiggle and push some more. If it just doesn't want to let go, start at the other side of the seam. If it still won't release, use a paring knife in the slit you have so far from the razor blade. A wider blade will usually be a better wedge to pull apart the seam. If all else fails, try holding the doll body under hot tap water for a few minutes and then try it. Usually they're aren't this hard to open, though. |
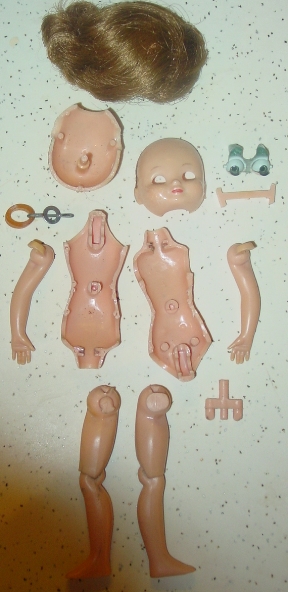 |
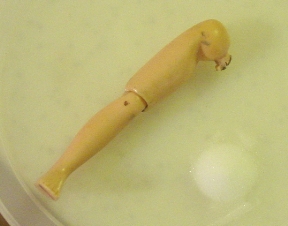
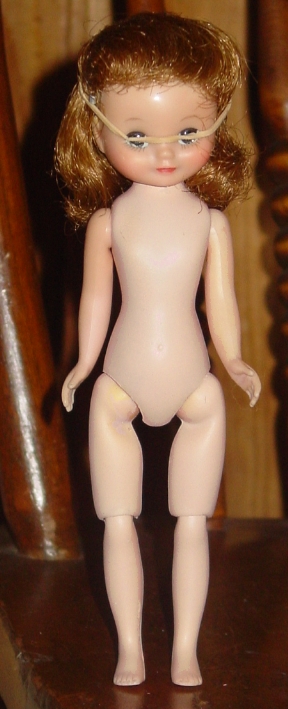
I'm going give this doll a facial before I put her back together again, so am taking her completely apart. Here is the entire doll and all her pieces. There should be one more little rubber band there for her arms but it didn't make it into the picture. You can see the difference between the good leg and the broken one. That's what needs to be repaired if Betsy is ever going to dance again. |
|
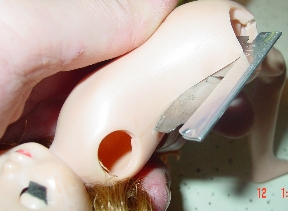
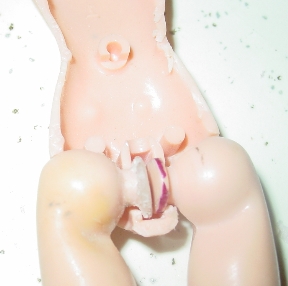
Here I'm comparing the two joints. I want this one to be a mirror image of the good one. |
|
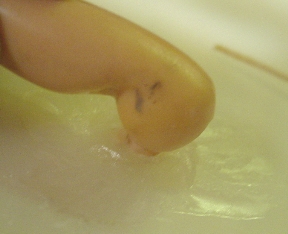
To get a good bond, I heated an old knife and melted a fairly deep cross on the bad joint. This will give me some irregularity to the surface and more for the Plas-T-Pair to bond to.
Now we're ready for the Plas-T-Pair. I put a mound of the powder about the size of a quarter onto a plastic coffee can lid. Plas-T-Pair won't stick to this kind of plastic, so it makes a good pallet. |
 |
Now I add a few drops of the Plas-T-Pair liquid into the mound of powder until the powder melts into a gell. |
|
Here I push the joint around in the gell letting it coat the surface and flow into the knife cuts I made. In about 20 seconds, it starts to thicken and for a brief time, I can mold this with my fingers into a sort of disk. |
|
A few seconds later, it gets warm, cures, and is rock hard. |
|
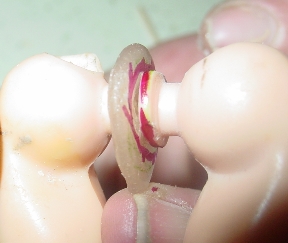
Now my crude button has to be shaped into one matching the other joint. Right now, it's way too big and will never fit into that slot inside the doll. First, I hold the two together and draw around the good joint on the one I just made. |
|
From the outline, we can see that the joint isn't perfectly round. It's this odd shape that works with the mechanism to let the doll's legs lock into place when standing or sitting, so it's important to match that shape. I'll be pretty close if I just carve off my red marks and then worry about the thickness of the disk. |
|
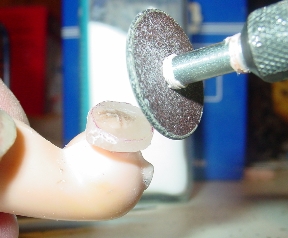
So here I am with the Dremmel trimming off the red. Wear glasses or goggles when you do this. I'm not big on safety precautions but for this, even I each for the goggles. When that plastic flies it has a way of aiming for the eyes and it really hurts. Another thing - I have to get my face close to this to see what I'm doing and if I don't watch closely, the high speed Dremmel can touch and cut fingers. So, I'm stressing - BE CAREFUL!! |
|
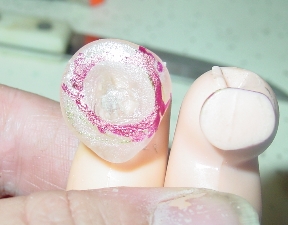
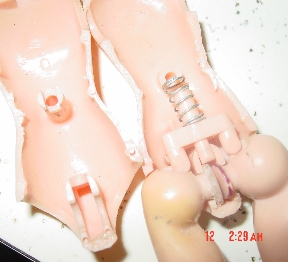
There! The red is all off the new piece. Now I just have to see if I have it thin enough to fit into the slot next to the button on the other leg. |
|
The fit is really good. It's firm but not so tight as to restrict the movement of the ther disk. How lucky! The trick is to not trim too much. If you do, you can always mix up more Plas-T-Pair and start over, but this time, it won't be necessary. |
|
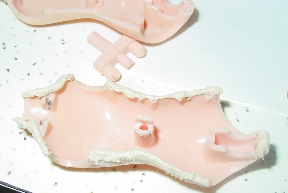
Here's the whole works ready to get the top half of the body glued back on. Not showing is the little washer with the rubber band on it that goes into the slit in the neck. Put this in, too before putting on the top half. |
|
So, I cover the edge of the seam with Plastic Paste. drop in the pieces as shown above and then put on the other half of the body. |
|
And with a set finger, smooth and then wipe off the excess. |

|
And secure with a rubber band around the waist. |
|
Now that the paste is dry (about 10 hours later) I put her bald head on. Then used white glue (Elmer's) to glue on the wig. It's still drying so that's why the rubber band is holding it in place. But otherwise, she's finished. Look Ma! No doll stand! |