
|
Looking into the thigh there is a piece on either side where the plastic
peg has broken or worn off. Use a needle to pry these two strips away
from the sides. The arrows point to these two pieces which are now
jutting toward the center.
|
|
Use the needle-nosed pliers to pull out the little pieces you just
pulled away from the sides. They're just taking up room you'll need
for the new pegs you're going to make. Get a good grip with the pliers
nd pull slowly so that the whole piece comes out. This picture shows
what the pulled piece looks like. I'm holding it with long tweezers
so you can see it better.
|

|
|
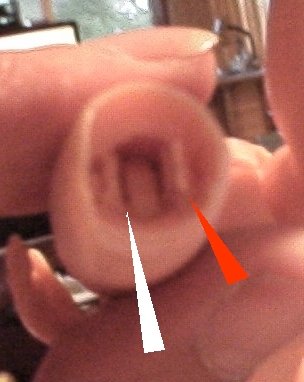
In this picture the white arrow points to where the peg has been pulled.
The red arrow points to the peg that still has to be removed.
|
|
Beyond the socket below where the old pegs were is another piece that
is fitted close to the sides. Push the darning needle between the side
and this piece to open it up a bit. Push the needle as far as you can
into the leg. Wiggle and pry but it has to go in almost the length
of a straight pin. Do this on both sides.
|

|
|
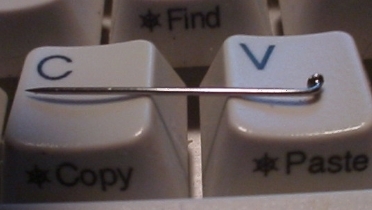
Bend two straight pins as shown in the picture.
|
Push the pins into the channels you opened with the darning
needle. Push them in all the way to the inside of the thigh so the pin heads
are where the old pegs would have been when the leg was in the socket.
Once you can do the, use the pliers to pull them out to the position
shown in the picture.
At this point you could use a toothpick to put a drop of Elmer's
on the point where the pin meets the plastic. Use it sparingly,
though because you don't want the other part of the leg to touch it.
|

|

|
Fit the indents on the calf where the old pegs fit onto the pin heads.
Holding the pins in place on the leg, push up into the thigh. You may
have to push one side and then the other or push one pin all the way in, hold it and angle the leg onto the pins and then push the other side. The harder it is to get this in, the firmer the hold will be, so be patient.
|
|
Once it's into position with pin heads in position on the calf, hold it
firmly on the sides of the thigh and on the calf under the pins, and
push it as far as it will go.
|

|
|
If you used glue, while it's drying, bend the knees once in a while
to make sure it doesn't freeze up the knee. To be safe, a drop of
baby oil on each knee should keep it from sticking.
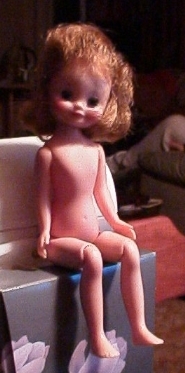
There! It's done! And she can still stand and sit perfectly and
her surgery didn't even leave a scar.
|