|
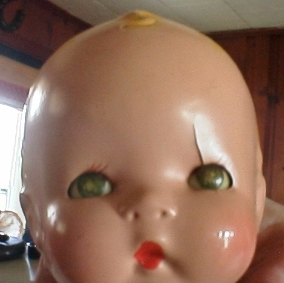
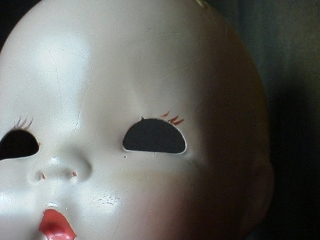
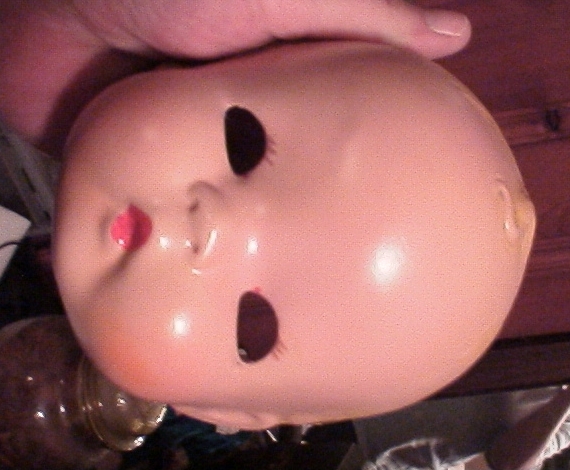
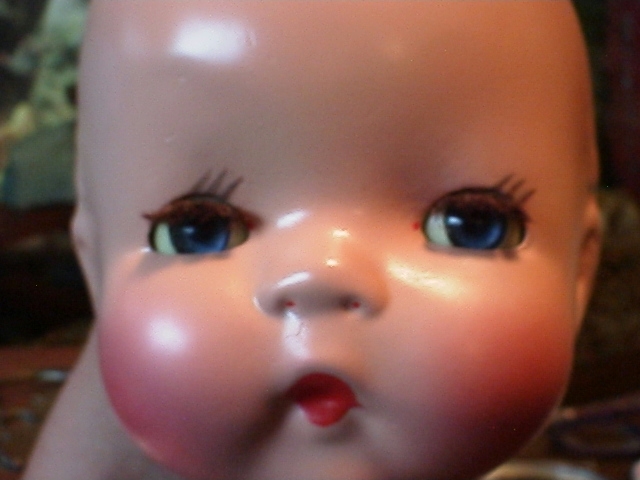
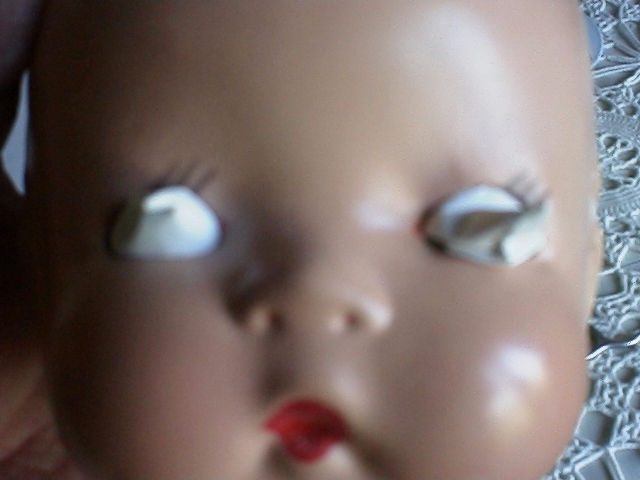
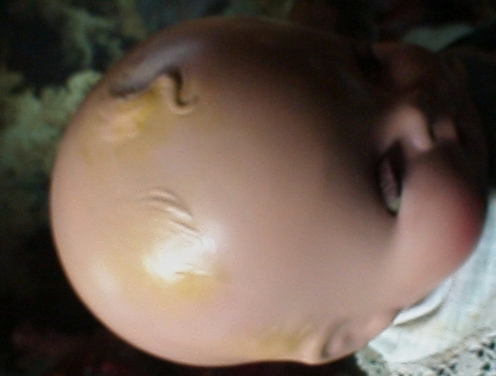
Once in a while we see a doll that has just one major crack on the face and otherwise it's just wonderful. This little Cherub by Harriet Flanders is just such a doll. The object is to repair just the crack, doing as little as possible to the rest of the face. This seems like such a small job, but you'll see it demonstrates the same techniques used for dolls with much more extensive damage.
|
|
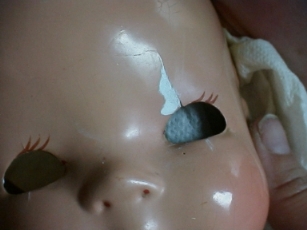
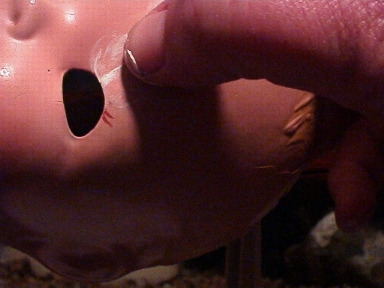
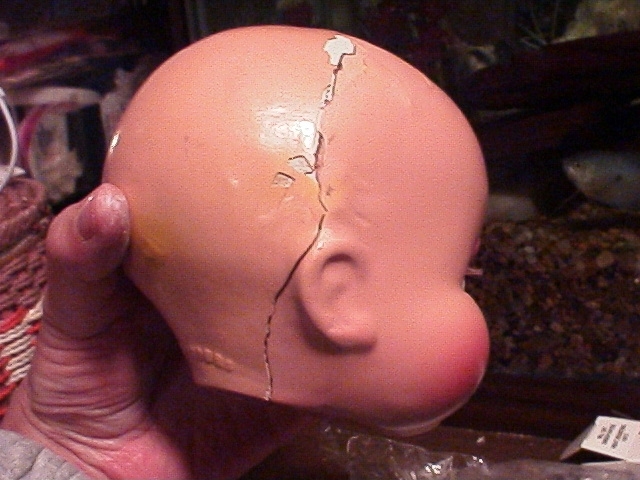
Let's look at the job. This crack is an old one. On one side the surface shell is lifting away from the core and the core itself has warped, so more than just a simple fill is required to make this repair invisible. The crack will have to be filled and then sanded so that both sides of the crack form a continuous curve instead of a ridge where the crack has been filled. As the ridge is sanded away, tiny air pockets will be exposed which will also have to be filled, either with more Milliput or if they are small enough, the paint will fill them. So the game plan is to fill, smooth, paint and repeat until the crack is no longer visible.
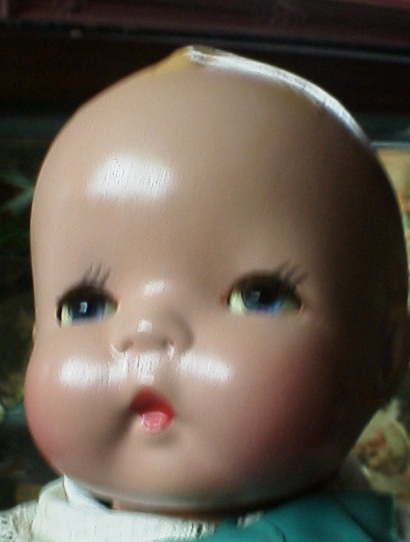
The first thing to do is remove the head. Before going further, take a good picture of the head to use for reference in the final stages of the job.
|
|
Since the eyes are blown, instead of masking them, I'm going to remove them and give them new corneas. But I'll need full access to get them back into the head.
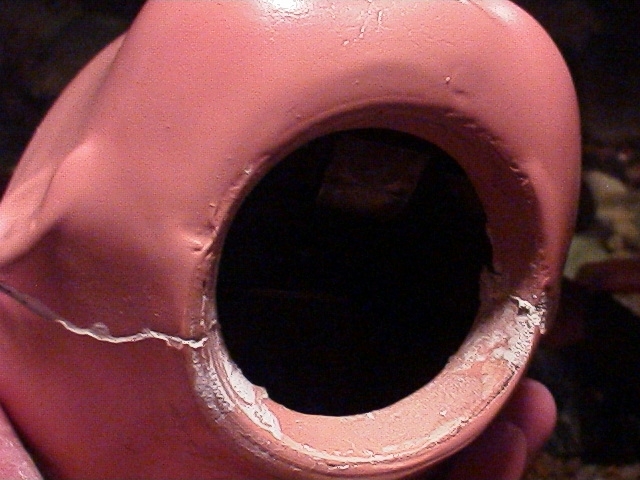
The head was originally made of two pieces and looking inside, the seam is still visible.
|
|
Looking closely, there is a hairline crack across the head right over this seam.
|
|
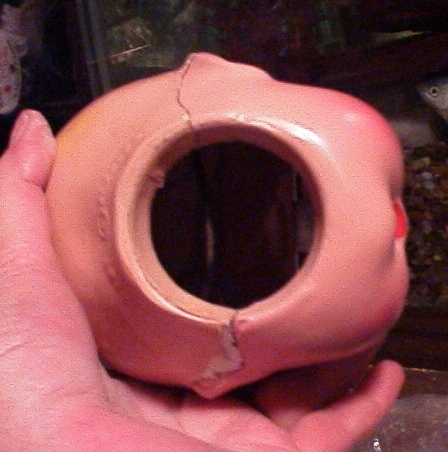
So a few sharp raps along the seam with the handle of a screwdriver cracks open the head like an egg. This was not the clean break I usually get, but this is a "live" production!
|

|
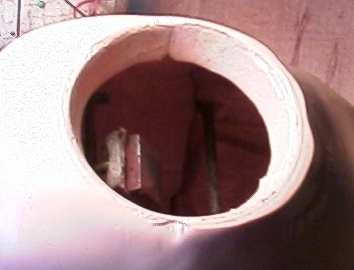
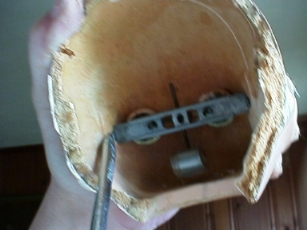
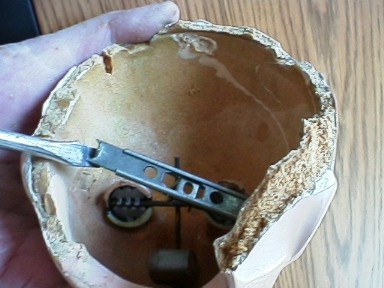
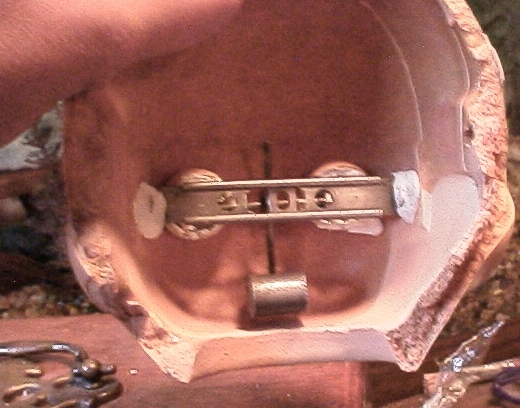
And here is the inside of the head.
|
|
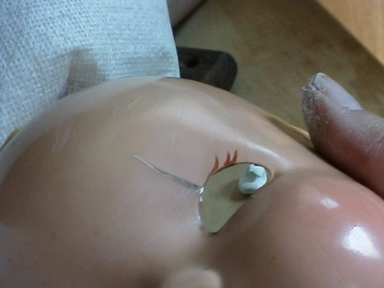
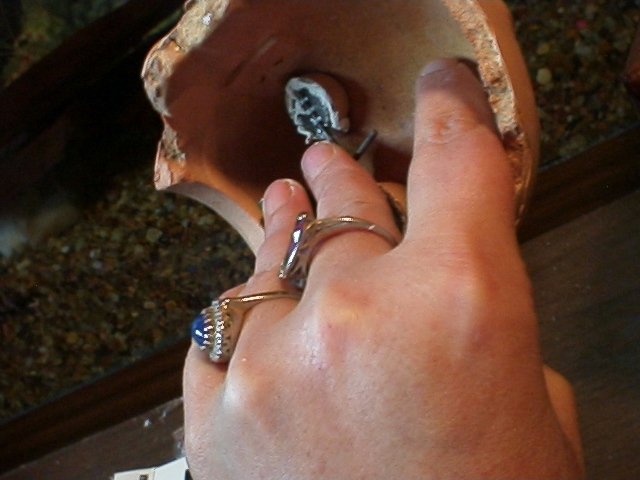
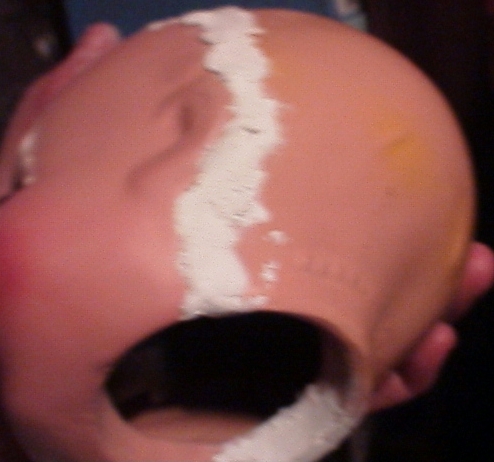
Dig into the compo at the side of the cross bar to release it from the head without bending it.
|
|
And lift out the cross bar. This bar is all that holds the eyes in position.
|
|
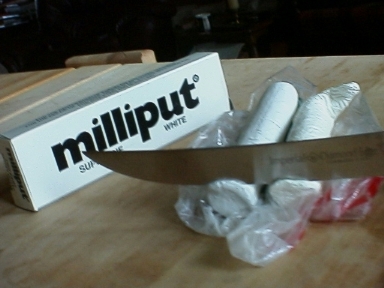
Now the Milliput. It will only require a tiny amount, so cut off two tiny slivers. I roll them into tiny balls so I can be sure the parts are equal. Then knead them together thoroughly.
|
|
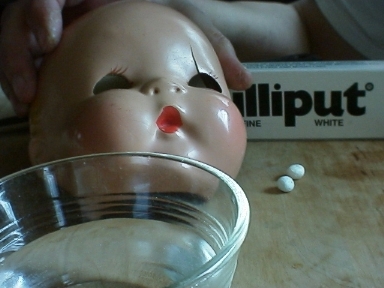
A dish of water (see WARNING at bottom of page) to moisten the mixture is also nice as well as a paper towel.
|
|
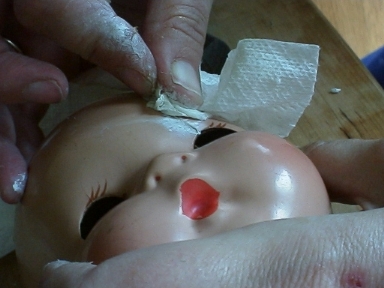
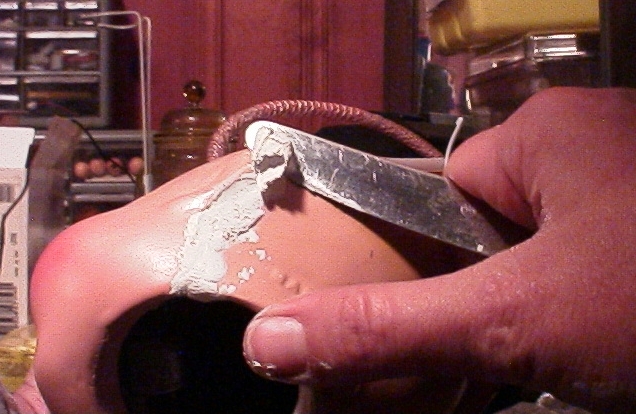
Push the Milliput into the crack. Try to fill it completely, especially under the edges that are lifted off the compo core.
|
|
Use your thumb and the back of your thumb nail to push in the Milliput and smooth it as much as possible.
|
|
Use the paper towel dipped in water to wipe off the excess going across the uneven compo. If you're working dry, lightly scrape off the excess with a wooden or plastic orange stick from a minicure set.
|
|
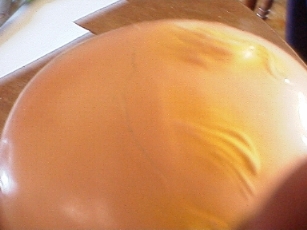
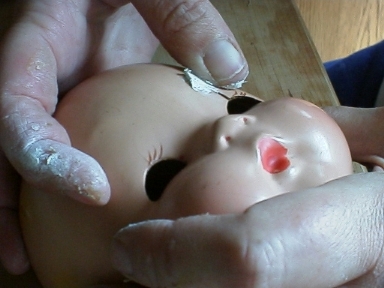
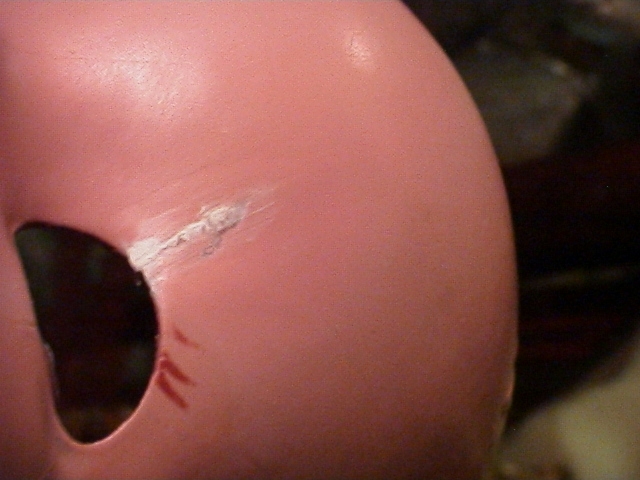
At this point, the crack is filled, but it's still not even across the forehead. A definite ridge would show if we stopped now. So a little more Milliput and a little more smoothing is in order.
|
|
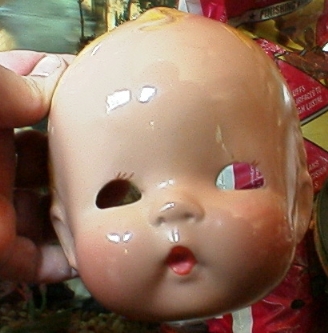
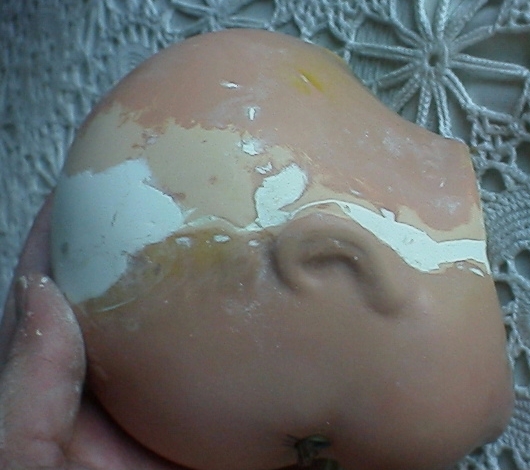
This is better! There's still a tiny gap at the eye opening that would be better to fill now, but I didn't see it until I took the picture and it will give me a chance to show that it can be corrected later. So let this cure for at least a day before the next step.
|
|
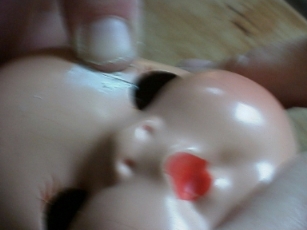
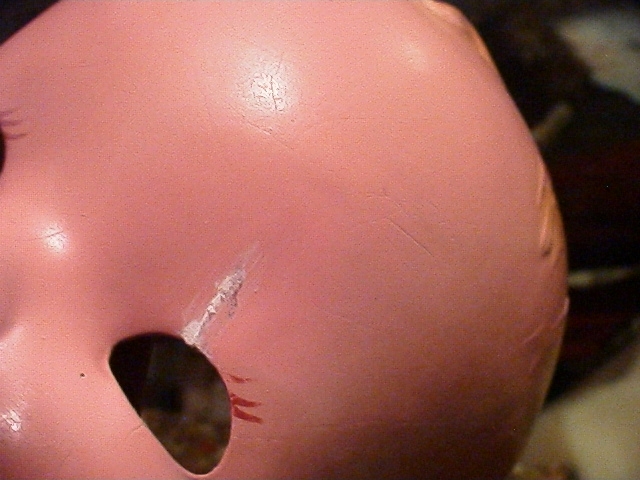
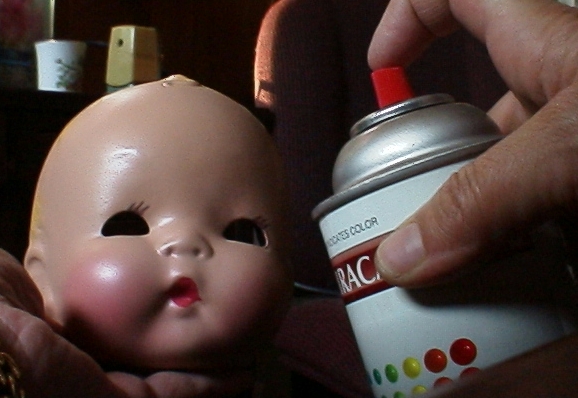
Which is the airbrush. Use oil-based pant and keep trying until
it's mixed to a perfect semi gloss match. The first spraying is
to show any flaws in the fill that need attention. Here we see there
is still a tiny nick at the base of the crack and still a definite
ridge. If the crack had been a smooth break instead of lifted and
uneven, we'd probably be almost done.
|
|
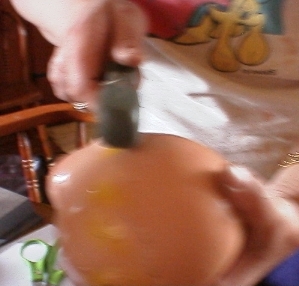
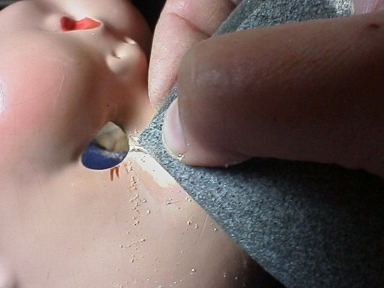
So now the sanding begins. I use a thin sanding sponge for this. They're made by 3M
(see the "What I Use" section) and are available at most hardware and
building supply stores. ACE Hardware sells them under its own brand name.
They come in three grades, coarse, medium and fine. For this I use the fine
grade. The technique is to keep stroking just the ridge.
|

|
When the ridge seems gone, I paint again. Paint will flow into a small crack
and sometimes that's all the filler that's needed. So painting will show if
we're finished yet.
|

|
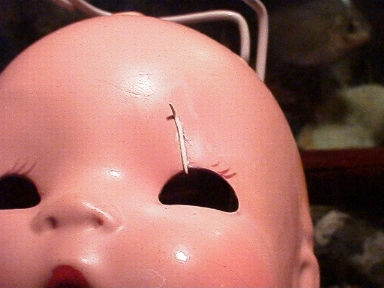
So after the next coat, I see the ridge is gone but the crack is back,
smaller, only about 3/4" now, but deep enough for more Milliput.
|
|
I make a roll about the thickness of a pencil lead and lay it into the crack.
|
|
Now I wet my fingers and the Milliput becomes a paste that I can work into
the small recesses. Because I'm filling over the paint, I don't have to
worry about wetting the core.
|
|
Now I let it harden once again.
|
|
And sand again.
|
|
And paint again.
|
|
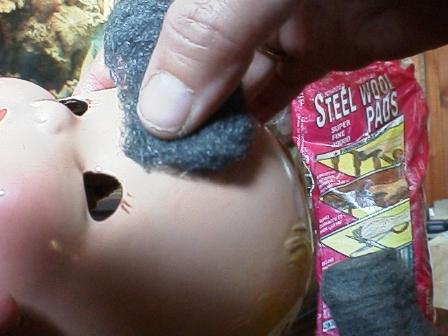
I can still feel a slight roughness so this time I buff with 0000 steel wool.
|

|
Then polish with rubbing compound.
|
|
The patch is back, so I need to paint again.
|
|
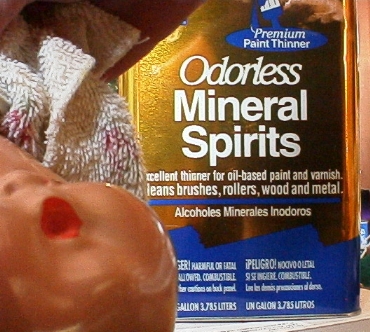
First, though, I have to get any wax residue off the face. So I wash with mineral spirits.
|
|
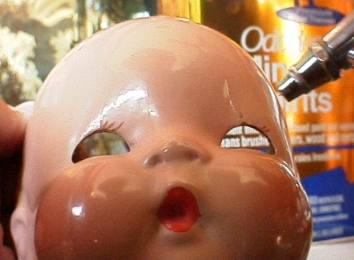
This time I use the finest and tightest spray pattern I can get with my air brush.
I don't want to fill now; just cover.
|
|
So finally the patch is invisible.
|
|
After letting the paint cure for a week, I'm ready to polish and restore the surface.
I spray with a clear gloss lacquer. This will even out the blend between the old and the new paint.
It's hardly visible, but after this, running a finger across the repaired spot will
not detect a difference in surface texture. It will also protect the surface
during the next steps.
|
|
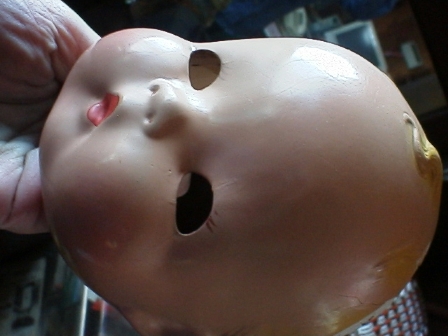
Now it's time to put the eyes back in. How I replaced the colored parts is
a topic I'll leave for another time. How I replaced the lashes is covered
in another topic already in the Hospital Section.
Place them into the head and hold them in place with a finger.
Make sure the eyes are on the cross bar
evenly and lined up to look straight ahead, close and open without crushing
the eyelashes, and without gaps between the socket and the ball.
|
|
Now put in the cross bar and match the holes in the compo with the prongs on the
sides of the bar. Again, make sure the eyes open and close freely.
Once they're lined up and held into position with the bar, put a small
ball of Milliput on each side of the bar to hold it in place.
|
|
Looks good!
|
|
Now it's time to put the head back together.
Fit the front and back into place and hold these pieces together while
forcing a thin line of Milliput into the seam.
|
|
The stress points on the strung doll are at the side seams of the neck,
so be sure the patch goes into the neck opening. We didn't put the Milliput
onto the two halves and fit together because we need the head and neck opening to
be exactly the same size and shape as it was originally.
|
|
Force the Milliput into the seam and out, away from the seam.
|
|
With a knife or a single edge razor blade,
trim off the excess and blend to make the Milliput as smooth
as possible and continuing the curve of the head.
|
|
If this had been
a clean break when I opened this, the Milliput would be
a thin line along the seam. Since this wasn't a clean break
I have to replace the broken surface pieces with Milliput, also.
|
|
After about four hours, the Milliput is hard enough to sand. I start with
a medium grit sand paper and work my way down to the fine sanding sponge.
|
|
When I can hold it up to the light and not see a ridge or bump in
the curve of the silhouette, I know I'm ready to paint.
|
|
But first I want to mask the eyes. If I slip with the airbrush and have to
paint the face at this point, it's not nearly the loss that getting over spray
on the eyes would be. At this point, I'm not taking any chances!
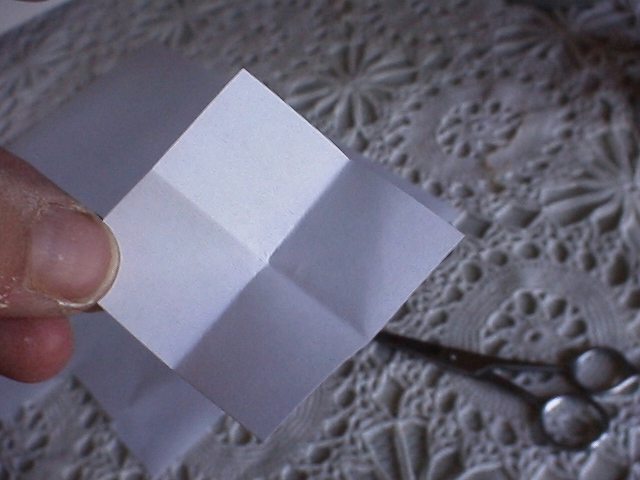
I take a piece of paper and cut a square, and fold into four.
|
|
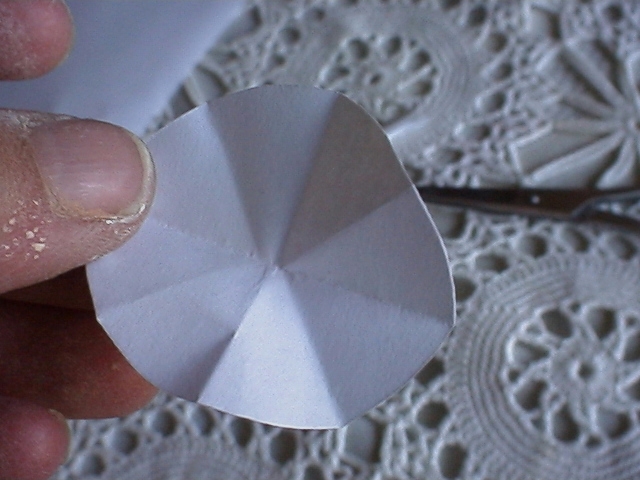
Then I fold into eight from the center and trim it to a circle.
|
|
Now I make a cone and twist the center fold to tighten the circumference
of the opening.
|
|
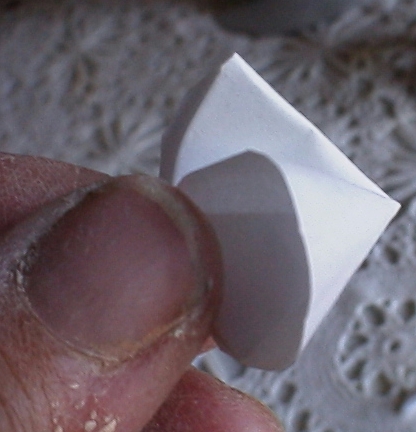
Now I push the cone into the eye socket, completely covering the eye. I push it
in far enough to hold firmly without crushing the lash.
|
|
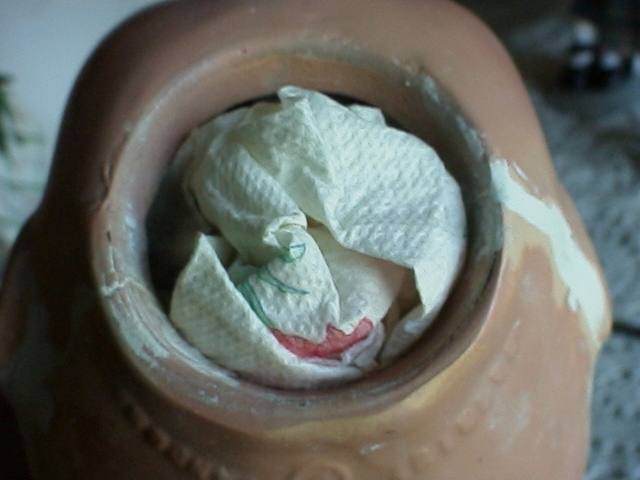
To make sure the eyes don't shift and push the cones out, I stuff a paper towel
into the neck to keep the counter weight from moving.
|
|
Happily, I was able to paint the patched seam and touch up the yellow hair
without incident.
|
|
So, I pull out the cones and put the head back on the doll.
|

|
There! All done! In a month or so, I'll buff him with a light coat
of Turtle Wax. This will give him a hard, shiny surface and protect
him from any moisture in the air.
|
Be careful using water on the Milliput. It works the Milliput
nicely, but can crinkle the old compo surface. If you're in doubt, forgo the
water, scrape off any excess Milliput with a dry knife or blade and then smooth
as much as possible with your fingers. When the Milliput hardens,
sand and sand some more.
Return to Front Page
Click Here to get Plastic Paste or Return to Order Page